Basic application functionality:
Open an image you want to edit
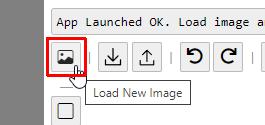
First thing you want to load new background image for your shapes to create.
For this task please click image button in the top left corner of the app:
Select an image from your disk drive and click Open/OK button of a file open dialog*.
*please note - we value your privacy and work speed, so no images are uploaded to the server, all processing happens on your computer only.To make image more opaque or transparent use image opacity slider. Shapes slider on the right will make the same adjustment for all shapes visibility:

By default they both are set to be semi-transparent.How to create basic shapes
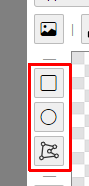
There are only 3 types of basic shapes you can create for image maps: rectangle, circle and freefrom shape.
All three buttons can be found below "image load" button we discussed in first place:
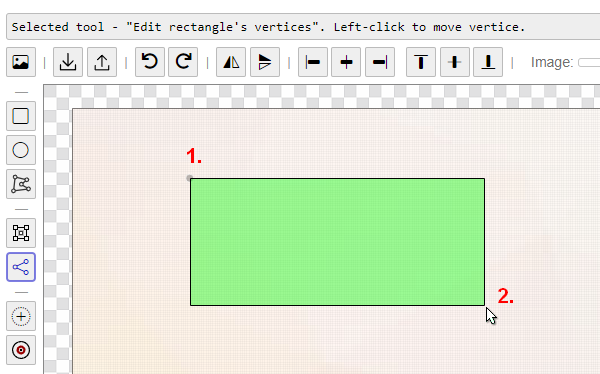
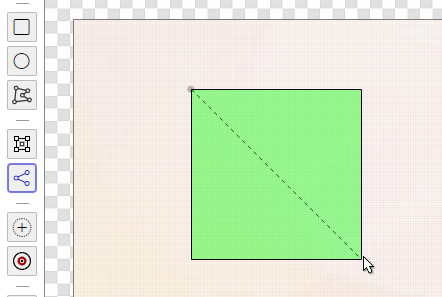
Rectangle shape is created by clicking on canvas two times: first corner and opposite corner: Rectangle
To create square rectangle shape please hold key on a keyboard before second click.
You will see diagonal line appears and new shape is restricted to square:
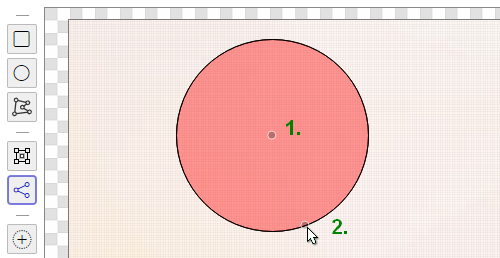
Circle shape is also created by clicking on canvas two times: first click - center and second - radius end: Circle/Ellipse
To create ellipse shape you still need to create a circle shape first and then transform it into ellipse later.
This will be discussed in "How to edit (transform) shapes".
How to create custom (freeform) shapes
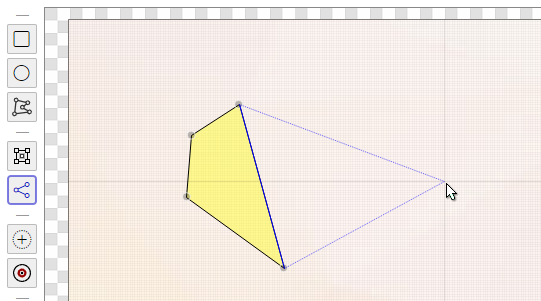
Freeform shape is created by clicking on canvas multiple times, at least three - to create triangle. Shapes with less than 3 points will be deleted. Freeform shape
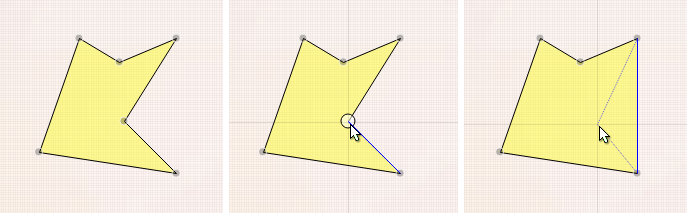
To delete any point of a new shape move mouse over the point and click right(other) mouse button.
To exit shape creation/edit mode begin to create any new shape by clicking button again, or use shape transform tool  .
.
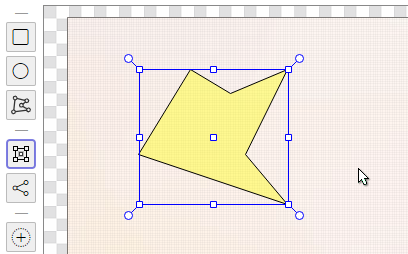
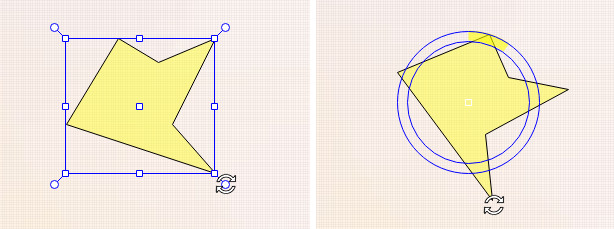
How to transform (move/scale/rotate) shapes
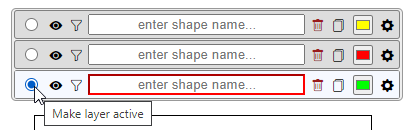
- Select a shape you want to transform in shapes list (upper-right part of application screen)
- To use a transform tool - click on button.
Selected shape will be drawn inside a blue transform box:
- To move shape to a new place mouse over the center blue rectangle - cursor will change into move icon:
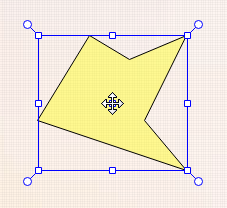
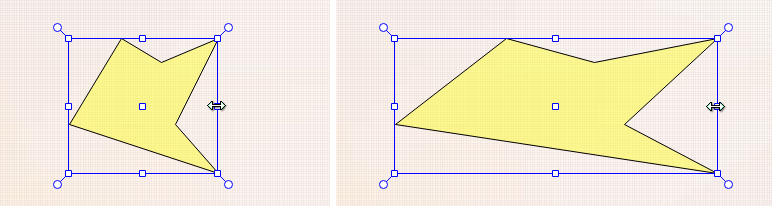
click and hold left mouse button and drag shape into a new place. - To scale shape - place mouse over any side or corner blue rectangle - cursor will change into scale icon.
Click and hold left mouse button and scale shape by dragging control point.
- To rotate shape - place mouse over any blue circle in corners - cursor will change into rotate icon.
Click and hold left mouse button and rotate shape by dragging control point.
- Select a shape you want to transform in shapes list (upper-right part of application screen)
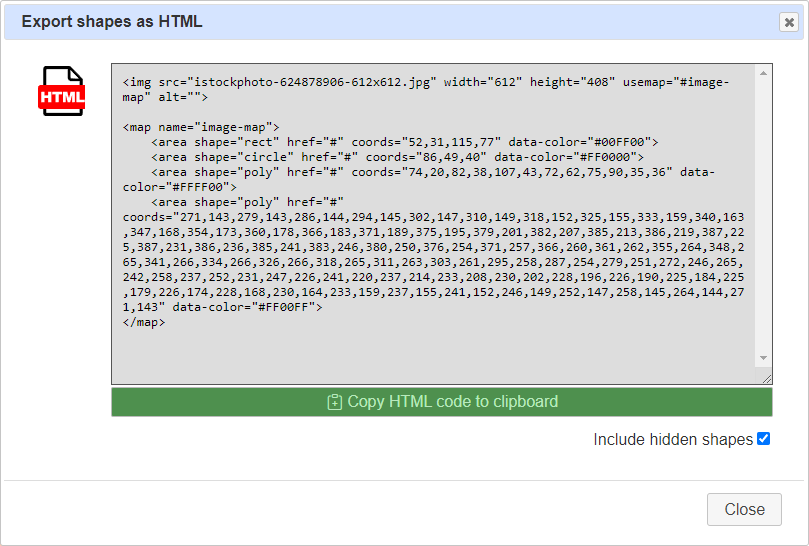
How to export/import created shapes
To export your created shapes and all image map click export button in the top button's line:

You will see HTML code inside export dialog. Copy and save it in your text-editing application.
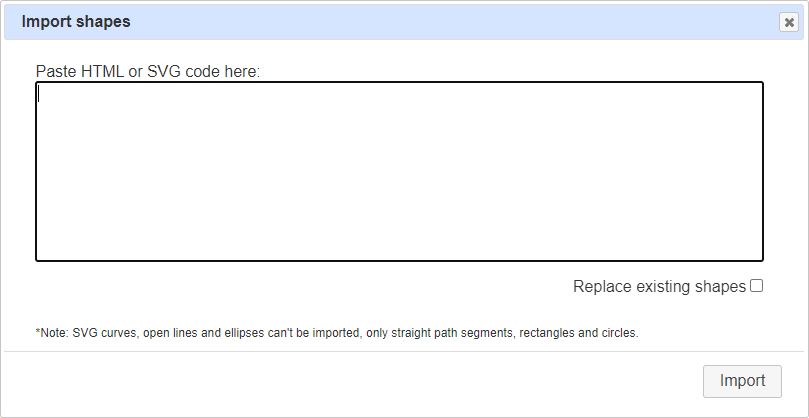
To import your previously created shapes or paths click import button in the top button's line:
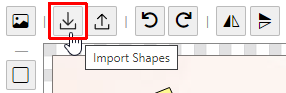
You can paste HTML code or SVG paths inside import dialog. Please paste full HTML with <map> and used <img> tags into a newly opened dialog